> ## Documentation Index
> Fetch the complete documentation index at: https://docs.cyberwave.com/llms.txt
> Use this file to discover all available pages before exploring further.
# Robotic arms
> Build manipulation automations with Cyberwave, using any type of robotic arm: from the hobbyist SO-101 to the UR7e
export const EdgeSetup = ({exclude = []}) => {
const showMac = !exclude.includes("mac");
const showLinux = !exclude.includes("linux");
const macCode = `curl -fsSL https://cyberwave.com/install.sh | bash\ncyberwave pair`;
const linuxCode = `curl -fsSL https://cyberwave.com/install.sh | bash\nsudo cyberwave pair`;
const linuxTip =
First time on a Raspberry Pi? See{" "}
Raspberry Pi Setup.
First time on a Jetson Orin Nano? See{" "}
Jetson Orin Nano Setup
.
;
if (showMac && showLinux) {
return
{macCode}
{linuxTip}
{linuxCode}
;
}
if (showMac) {
return {macCode};
}
if (showLinux) {
return <>
{linuxTip}
{linuxCode}
;
}
return null;
};
Cyberwave treats every arm the same: drop a digital twin into an [environment](/get-started/key-concepts#environments), pair the hardware, and start sending commands from the dashboard, the [Python SDK](/tools/python-sdk), or an AI controller. The same workflow scales from hobbyist desk arms to industrial cells.
***
## Pick your arm
Cyberwave supports **hundreds of robotic arms** out of the box, from the hobbyist [SO-101](https://cyberwave.com/the-robot-studio/so101) ([setup guide](https://cyberwave.com/the-robot-studio/so101)) and the industrial [Universal Robot UR7e](https://cyberwave.com/universal_robots/UR7) ([setup guide](https://cyberwave.com/universal_robots/UR7)) to everything in between. Browse the full lineup at [cyberwave.com/catalog/tag/robotic-arm](https://cyberwave.com/catalog/tag/robotic-arm).
Every catalog page bundles the **bill of materials**, supported drivers, and **troubleshooting** specific to that arm, so start there whenever you're unboxing new hardware.
***
## Set up an arm in 4 steps
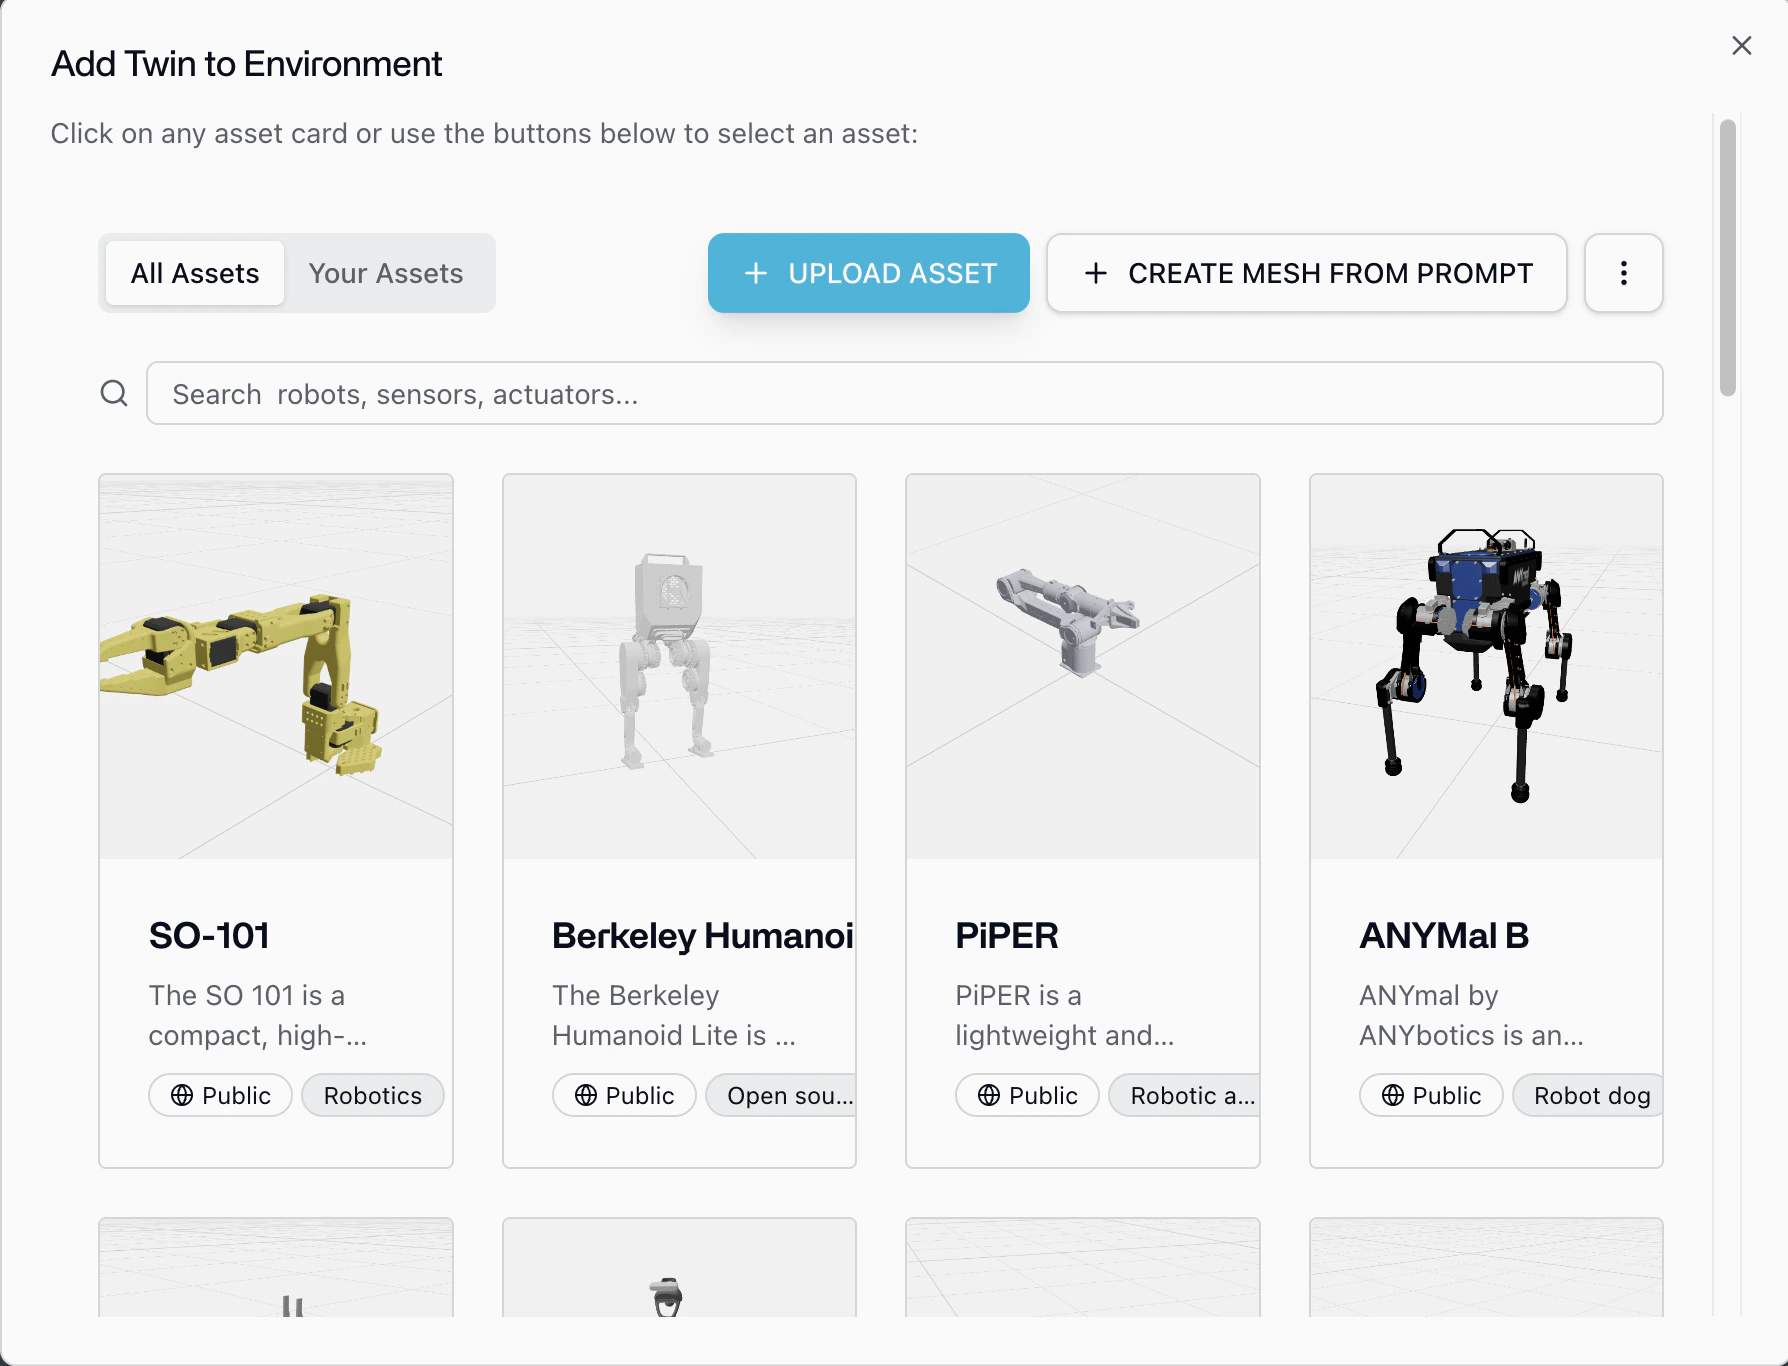
From the [dashboard](https://cyberwave.com/dashboard), click **New Environment**, then **Add from Catalog** and search for your arm (e.g. `SO-101`, `UR7e`). Position the twin to match your real workspace.
 Click **Add from Catalog** again and add a `Standard Camera` (or any other sensor twin). Dock it to the arm's wrist or place it overhead; the twin hierarchy mirrors your physical mount. With the camera attached you're already set up for [data collection](/use-cyberwave/environment-editor/replay).
On any device connected to the arm (laptop, Raspberry Pi, Jetson), install the CLI and pair:
The CLI auto-detects the arm, installs the right driver, and links it to the digital twin. See [Cyberwave Edge](/edge/overview) for details.
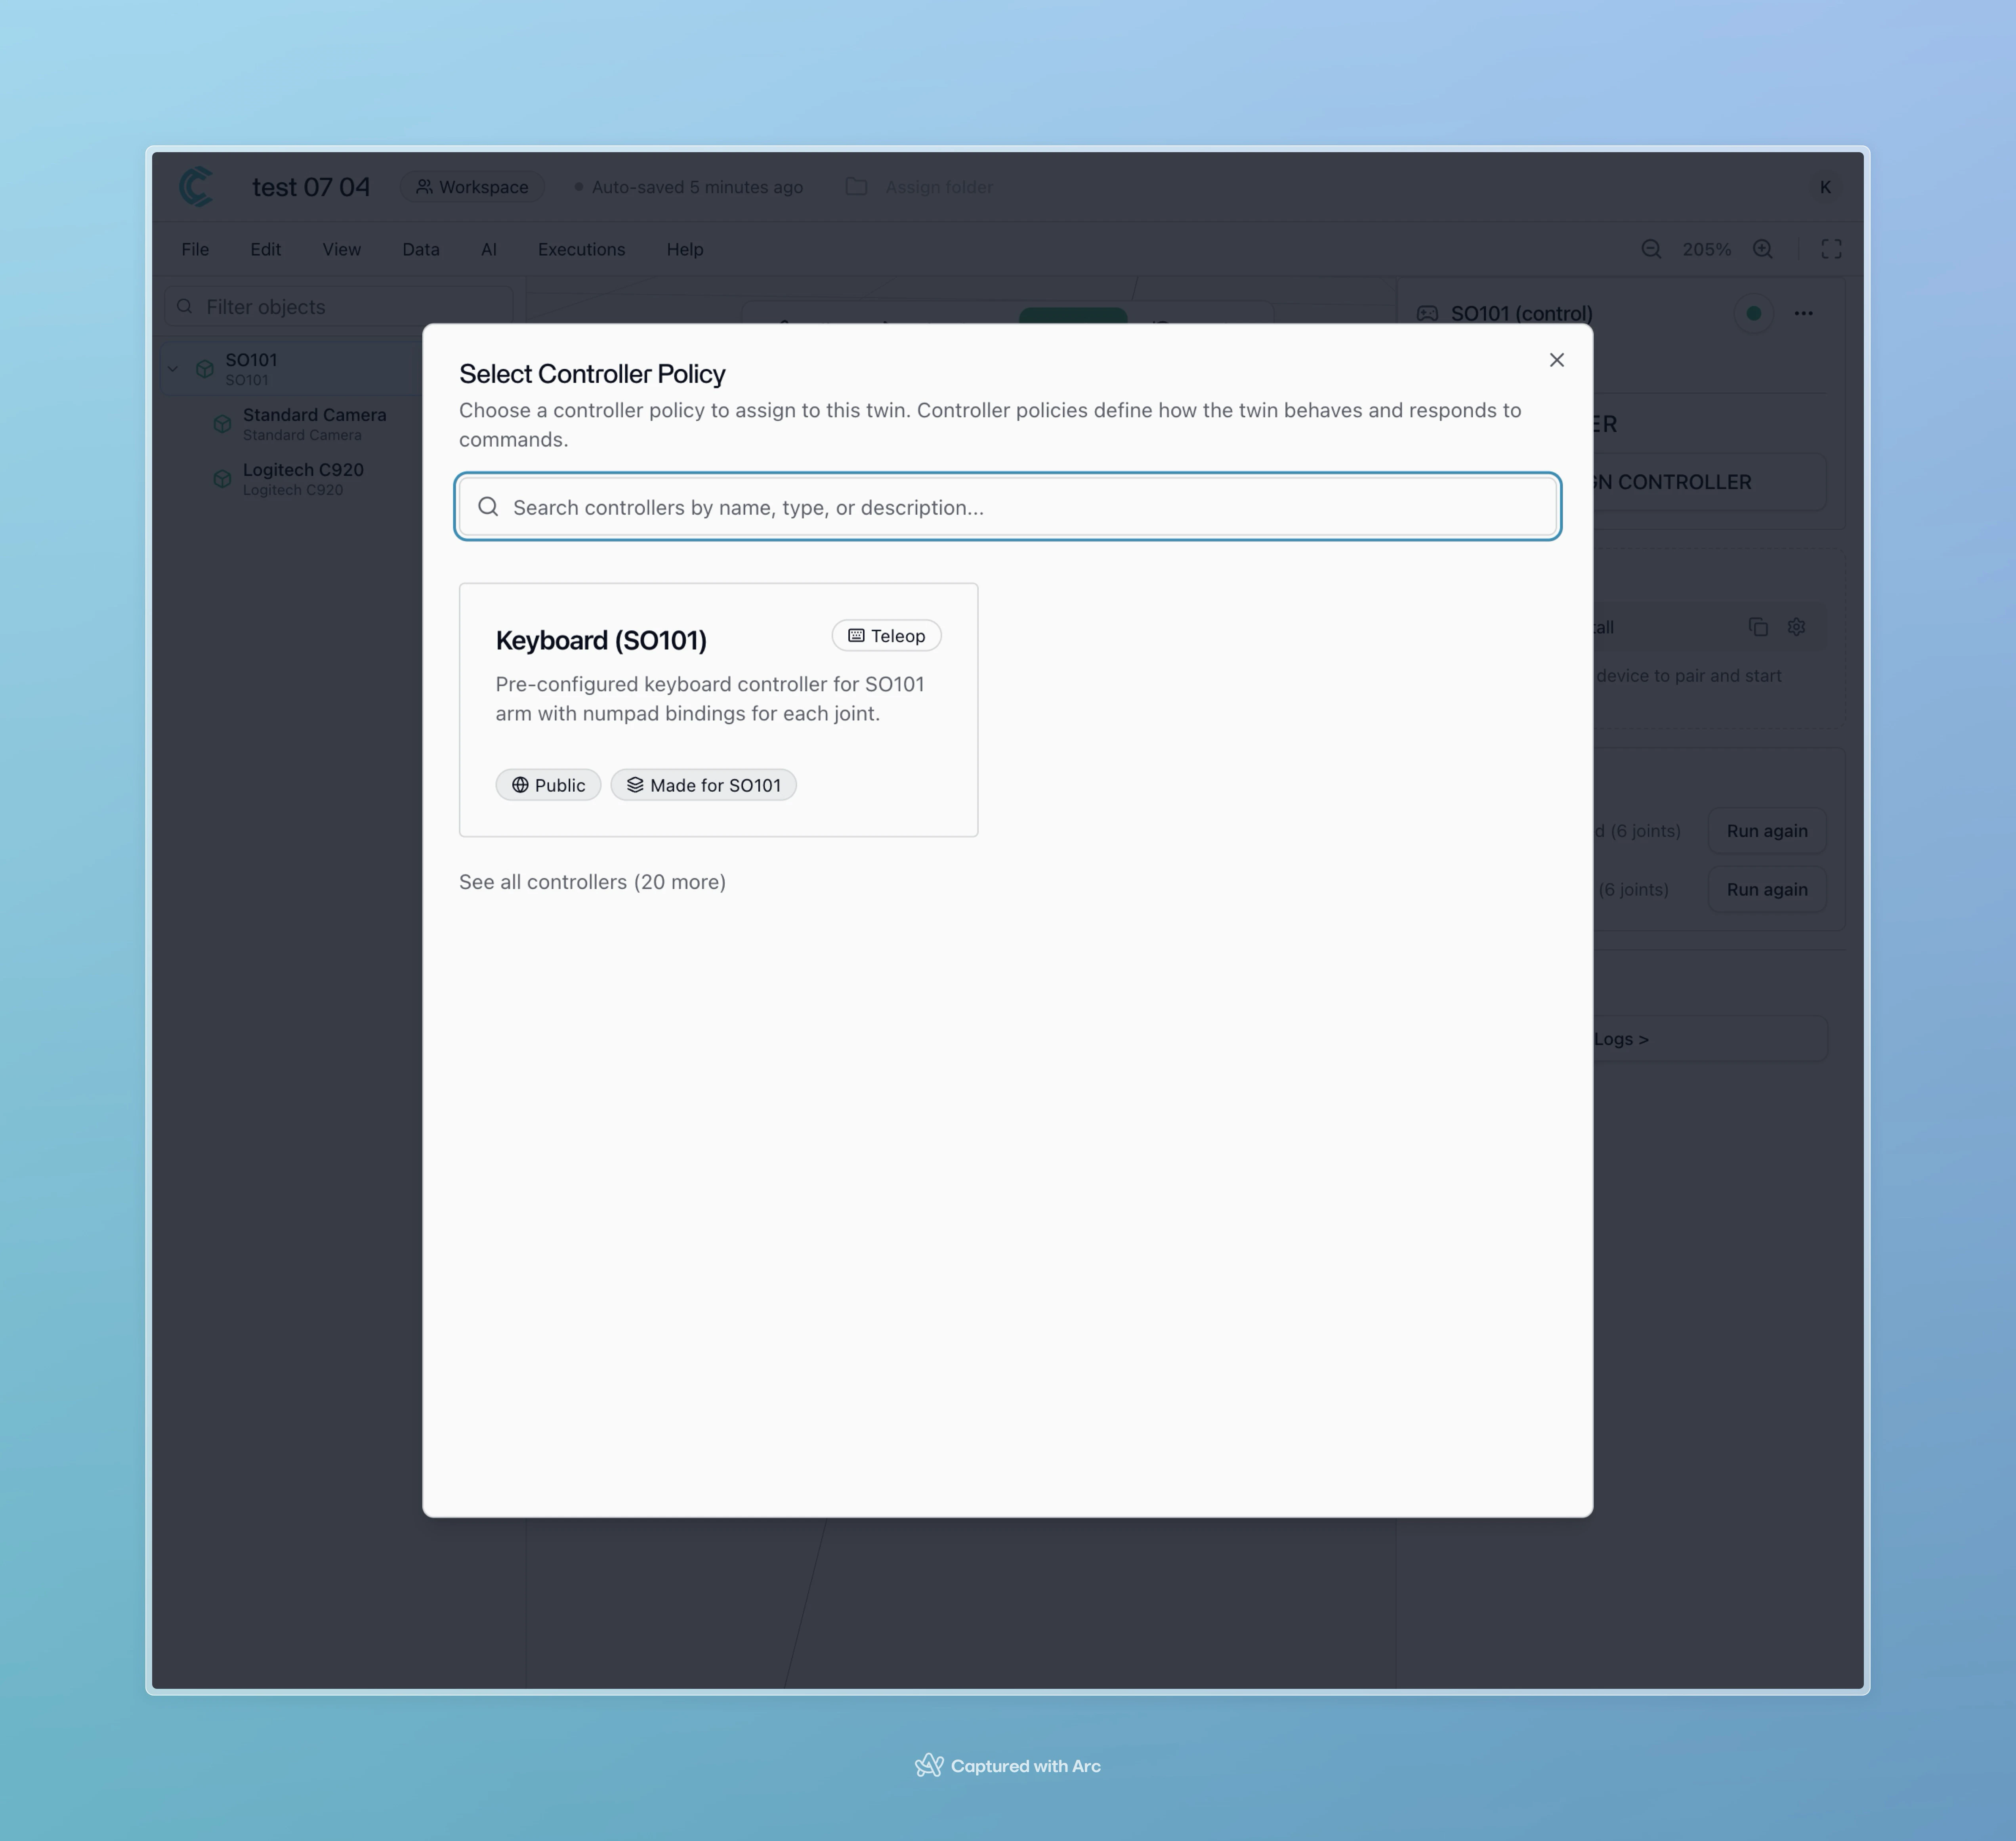
Open the twin in the dashboard, run **Calibrate** (required once per arm), then **Assign Controller**: pick **Keyboard**, **Local Teleop**, an AI policy, or a custom controller.
Click **Add from Catalog** again and add a `Standard Camera` (or any other sensor twin). Dock it to the arm's wrist or place it overhead; the twin hierarchy mirrors your physical mount. With the camera attached you're already set up for [data collection](/use-cyberwave/environment-editor/replay).
On any device connected to the arm (laptop, Raspberry Pi, Jetson), install the CLI and pair:
The CLI auto-detects the arm, installs the right driver, and links it to the digital twin. See [Cyberwave Edge](/edge/overview) for details.
Open the twin in the dashboard, run **Calibrate** (required once per arm), then **Assign Controller**: pick **Keyboard**, **Local Teleop**, an AI policy, or a custom controller.
 ***
## Control it from Python
Once the twin is paired, the [Python SDK](/tools/python-sdk) gives you the same API for any arm in the catalog:
```python theme={null}
from cyberwave import Cyberwave
cw = Cyberwave()
arm = cw.twin("the-robot-studio/so101") # or "universal_robots/UR7"
with cw.affect("live"):
arm.joints.set("shoulder_pan", 30, degrees=True)
arm.joints.set("elbow_flex", 45, degrees=True)
arm.joints.set("gripper", 0, degrees=True)
frame = arm.capture_frame("numpy") # grab the wrist camera frame
```
Swap `cw.affect("live")` for `cw.affect("simulation")` to run the exact same code against the digital twin. See [Hello Robot](/get-started/hello-robot) and the [simulation capability page](/capabilities/simulation).
***
## Collect data, train, deploy
Once an arm + camera pair is recording, you're already producing datasets.
Switch to **Live Mode** in the dashboard and hit **Start Recording** while you teleoperate. Trim the timeline into episodes and export as a LeRobot-format [dataset](/use-cyberwave/environment-editor/replay).
Train directly from the dashboard or with your own pipeline. See the [SO-101
voice pick-and-place](/tutorials/so101-voice-pick-and-place), [SmolVLA
training](/use-cyberwave/ml-models/smolvla-training), and [OpenVLA-OFT
training](/use-cyberwave/ml-models/openvla-oft-training) tutorials.
Assign the trained policy as a [controller](/use-cyberwave/ml-models). Cyberwave decides whether the model runs on the edge device next to the arm or in a [cloud node](/tools/vla-cloud-node); your code doesn't change.
***
## Safety, simulation, and orchestration
* **Human takeover anytime.** When an [alert](/edge/drivers/alerts) fires (collision risk, drift, anomaly), swap the AI policy back to **Local Teleop** or **Keyboard** with one click; the twin keeps streaming so the handover is seamless.
* **Validate in simulation first.** Every environment exports to MuJoCo and a browser playground, so run the same policy against the twin before letting it touch hardware. See [Simulation](/capabilities/simulation).
* **Compose multi-step tasks.** Wire perception, planning, and motion into repeatable sequences with [Workflows](/use-cyberwave/workflows) (e.g. `camera frame → object detection → VLA policy → gripper primitive`), and fall back to Python whenever a step needs custom logic.
***
## Where to go next
The full picture of what arms can do on Cyberwave.
Step-by-step for the hobbyist arm.
Industrial setup with ROS 2 and the MQTT bridge.
***
## Control it from Python
Once the twin is paired, the [Python SDK](/tools/python-sdk) gives you the same API for any arm in the catalog:
```python theme={null}
from cyberwave import Cyberwave
cw = Cyberwave()
arm = cw.twin("the-robot-studio/so101") # or "universal_robots/UR7"
with cw.affect("live"):
arm.joints.set("shoulder_pan", 30, degrees=True)
arm.joints.set("elbow_flex", 45, degrees=True)
arm.joints.set("gripper", 0, degrees=True)
frame = arm.capture_frame("numpy") # grab the wrist camera frame
```
Swap `cw.affect("live")` for `cw.affect("simulation")` to run the exact same code against the digital twin. See [Hello Robot](/get-started/hello-robot) and the [simulation capability page](/capabilities/simulation).
***
## Collect data, train, deploy
Once an arm + camera pair is recording, you're already producing datasets.
Switch to **Live Mode** in the dashboard and hit **Start Recording** while you teleoperate. Trim the timeline into episodes and export as a LeRobot-format [dataset](/use-cyberwave/environment-editor/replay).
Train directly from the dashboard or with your own pipeline. See the [SO-101
voice pick-and-place](/tutorials/so101-voice-pick-and-place), [SmolVLA
training](/use-cyberwave/ml-models/smolvla-training), and [OpenVLA-OFT
training](/use-cyberwave/ml-models/openvla-oft-training) tutorials.
Assign the trained policy as a [controller](/use-cyberwave/ml-models). Cyberwave decides whether the model runs on the edge device next to the arm or in a [cloud node](/tools/vla-cloud-node); your code doesn't change.
***
## Safety, simulation, and orchestration
* **Human takeover anytime.** When an [alert](/edge/drivers/alerts) fires (collision risk, drift, anomaly), swap the AI policy back to **Local Teleop** or **Keyboard** with one click; the twin keeps streaming so the handover is seamless.
* **Validate in simulation first.** Every environment exports to MuJoCo and a browser playground, so run the same policy against the twin before letting it touch hardware. See [Simulation](/capabilities/simulation).
* **Compose multi-step tasks.** Wire perception, planning, and motion into repeatable sequences with [Workflows](/use-cyberwave/workflows) (e.g. `camera frame → object detection → VLA policy → gripper primitive`), and fall back to Python whenever a step needs custom logic.
***
## Where to go next
The full picture of what arms can do on Cyberwave.
Step-by-step for the hobbyist arm.
Industrial setup with ROS 2 and the MQTT bridge.