Overview
Access control in Cyberwave enables you to securely manage who can view, edit, and administer your data. With flexible permission models and sharing options, you can collaborate effectively with your team while maintaining security and control over your data.
Key Capabilities:
- Role-based access control with Viewer, Editor, and Admin permissions
- Project-level sharing with specific team members
- Public link sharing for demos and external collaboration
- Organization and workspace membership management
Access Control and Sharing
Project Sharing
Projects can be shared with specific users or made publicly accessible through links.
Role-Based Access
Share projects with team members using three permission levels:
| Role | Permissions |
|---|
| Viewer | View project, environments, and simulations (read-only) |
| Editor | Create and modify environments, twins, and datasets |
| Admin | Full control including project settings, sharing, and deletion |
- Navigate to your project settings.
- Click Share.
- Add users by email.
- Assign appropriate role (Viewer, Editor, or Admin).
- Send invitation.
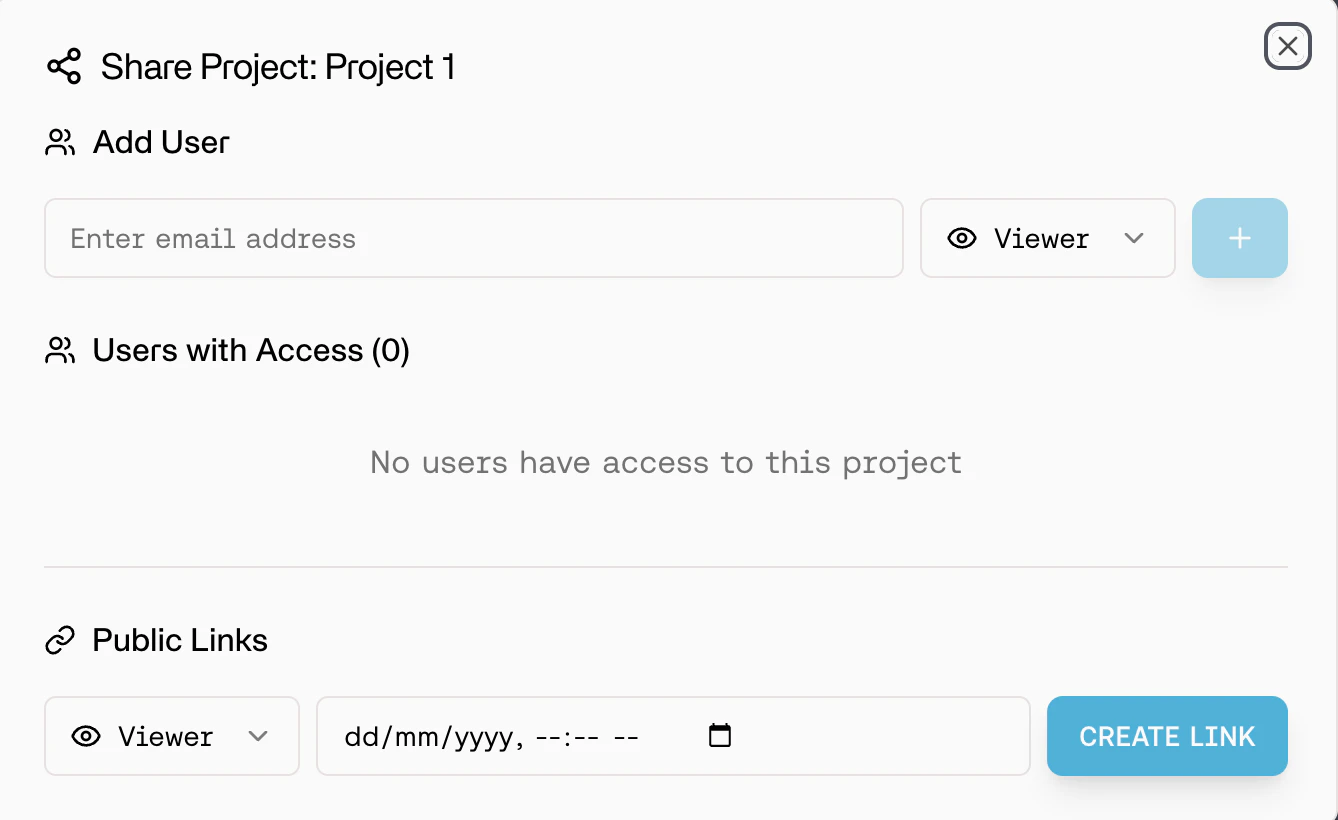
Public Link Sharing
Create shareable links for broader access without requiring authentication:
Link Types:
- Public Viewer Link: Anyone with the link can view the project (read-only).
- Public Editor Link: Anyone with the link can edit the project.
Use Cases:
- Share demos with stakeholders
- Collaborate with external partners
- Create public showcases of your work
Public links grant access to anyone who has the link. Use public editor links cautiously and only for trusted collaborators.
Team Management
Adding Team Members
To Organization:
- Navigate to Organization Settings -> Organization Members.
- Click Add Member.
- Enter email address and set organization role.
- Send invitation.

To Workspace:
Option 1: Add Existing Organization Member
- Navigate to Workspace Settings -> Team Members.
- Click Add User.
- Select from existing organization members.
- Click Add User.
Option 2: Add External User
- Navigate to Workspace Settings -> Team Members.
- Click Add Member.
- Enter external user’s email.
- User will be added to both organization and workspace.
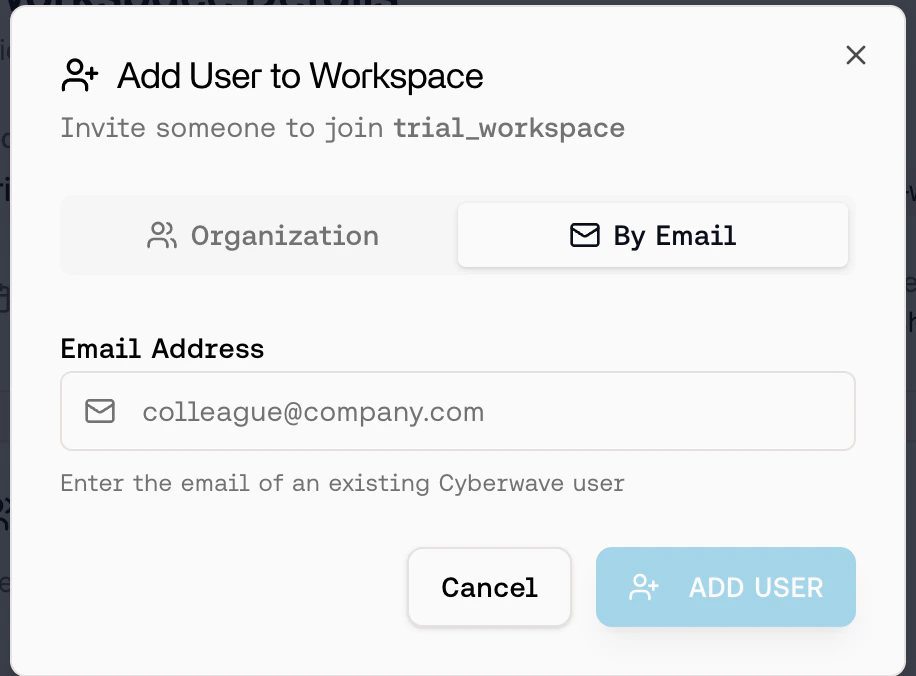
When adding external users to a workspace, they automatically become members of your organization as well. This ensures proper billing and access control.
