Pick your arm
Cyberwave supports hundreds of robotic arms out of the box, from the hobbyist SO-101 (setup guide) and the industrial Universal Robot UR7e (setup guide) to everything in between. Browse the full lineup at cyberwave.com/catalog/tag/robotic-arm. Every catalog page bundles the bill of materials, supported drivers, and troubleshooting specific to that arm, so start there whenever you’re unboxing new hardware.Set up an arm in 4 steps
Create an environment and add the arm
From the dashboard, click New Environment, then Add from Catalog and search for your arm (e.g. 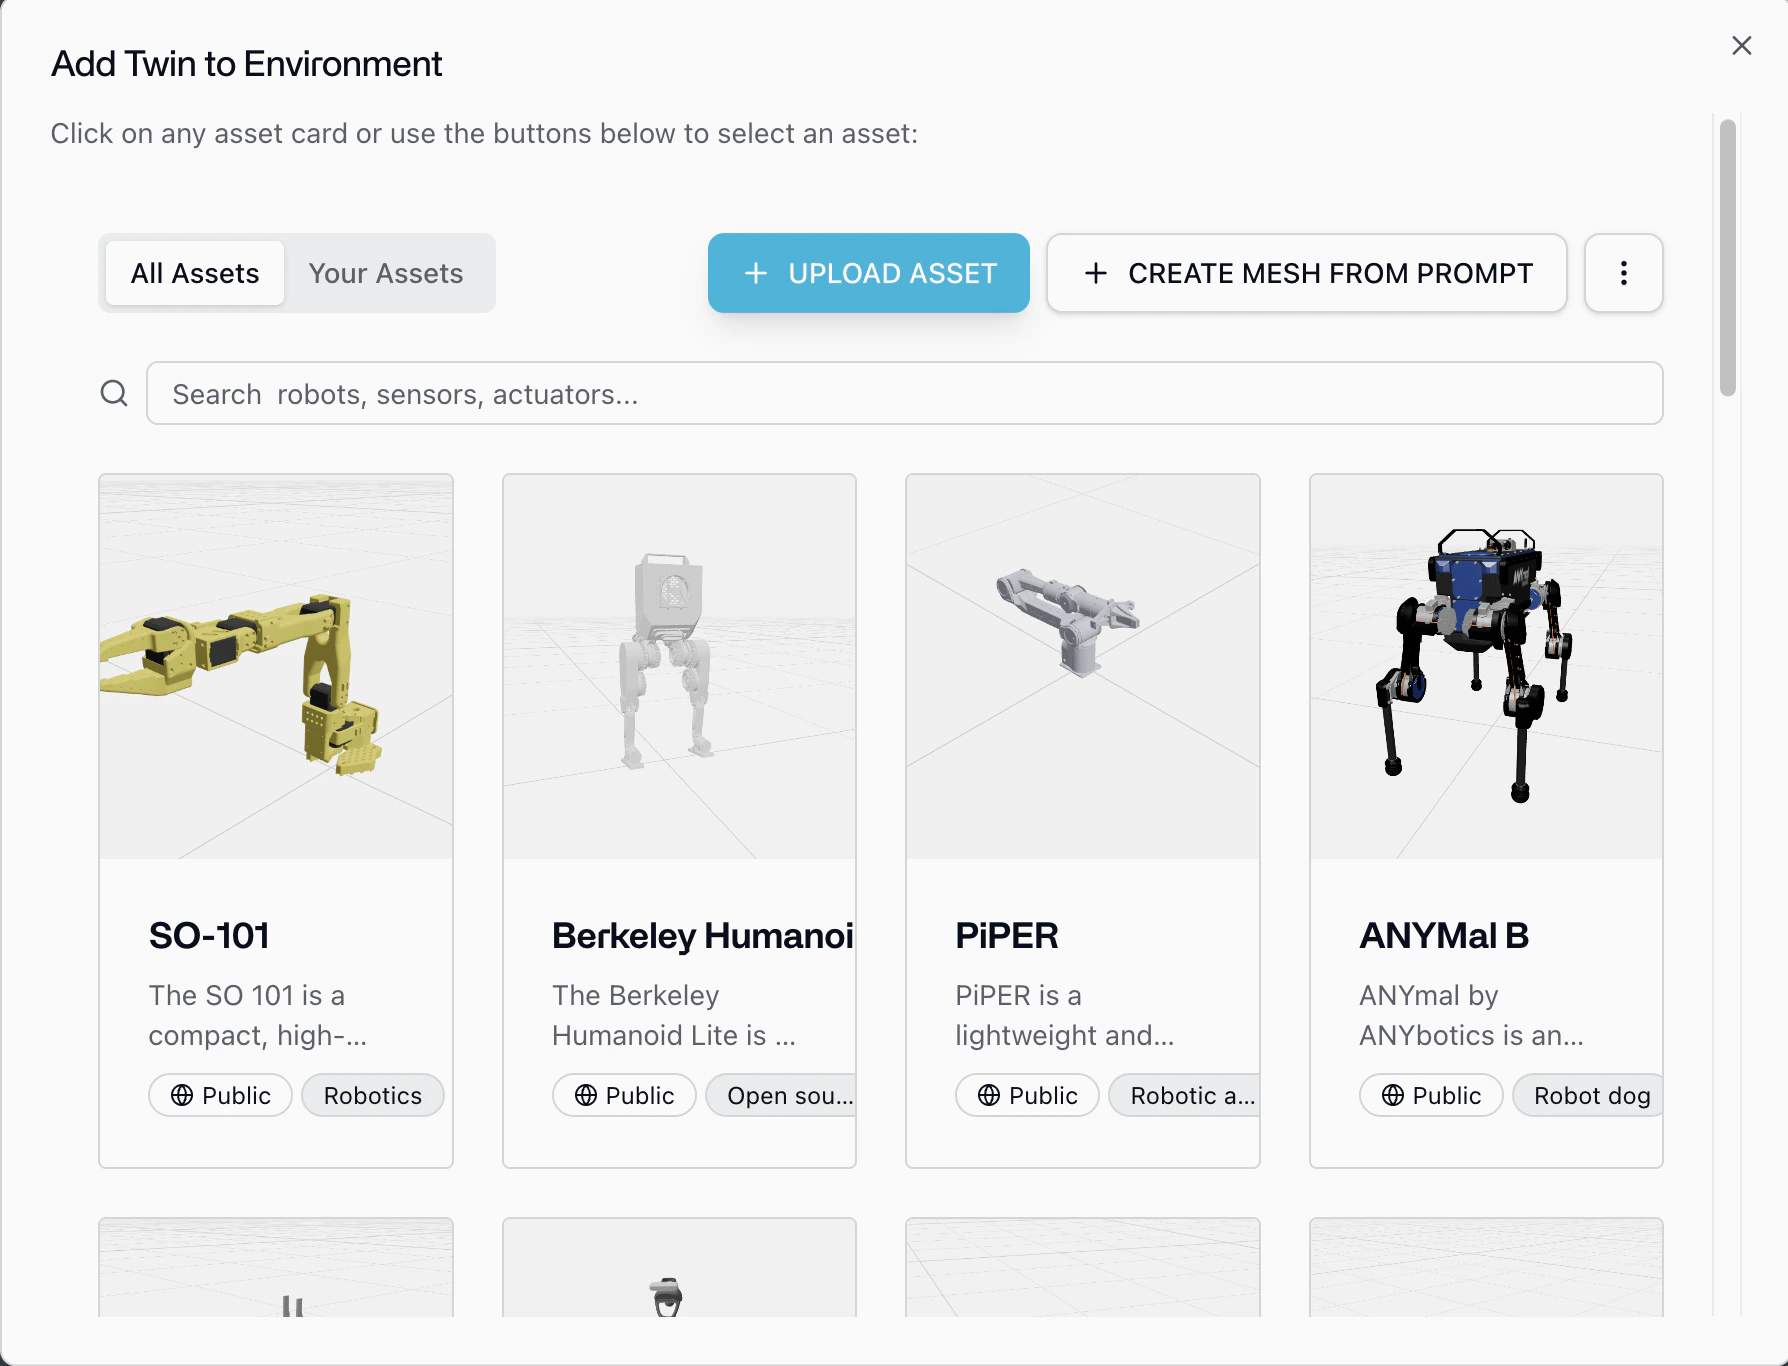
SO-101, UR7e). Position the twin to match your real workspace.Add cameras and other sensors
Click Add from Catalog again and add a
Standard Camera (or any other sensor twin). Dock it to the arm’s wrist or place it overhead; the twin hierarchy mirrors your physical mount. With the camera attached you’re already set up for data collection.Pair the hardware
On any device connected to the arm (laptop, Raspberry Pi, Jetson), install the CLI and pair:The CLI auto-detects the arm, installs the right driver, and links it to the digital twin. See Cyberwave Edge for details.
Control it from Python
Once the twin is paired, the Python SDK gives you the same API for any arm in the catalog:cw.affect("live") for cw.affect("simulation") to run the exact same code against the digital twin. See Hello Robot and the simulation capability page.
Collect data, train, deploy
Once an arm + camera pair is recording, you’re already producing datasets.Record episodes
Switch to Live Mode in the dashboard and hit Start Recording while you teleoperate. Trim the timeline into episodes and export as a LeRobot-format dataset.
Train an RL or VLA policy
Train directly from the dashboard or with your own pipeline. See the SO-101
voice pick-and-place, SmolVLA
training, and OpenVLA-OFT
training tutorials.
Deploy on edge or cloud
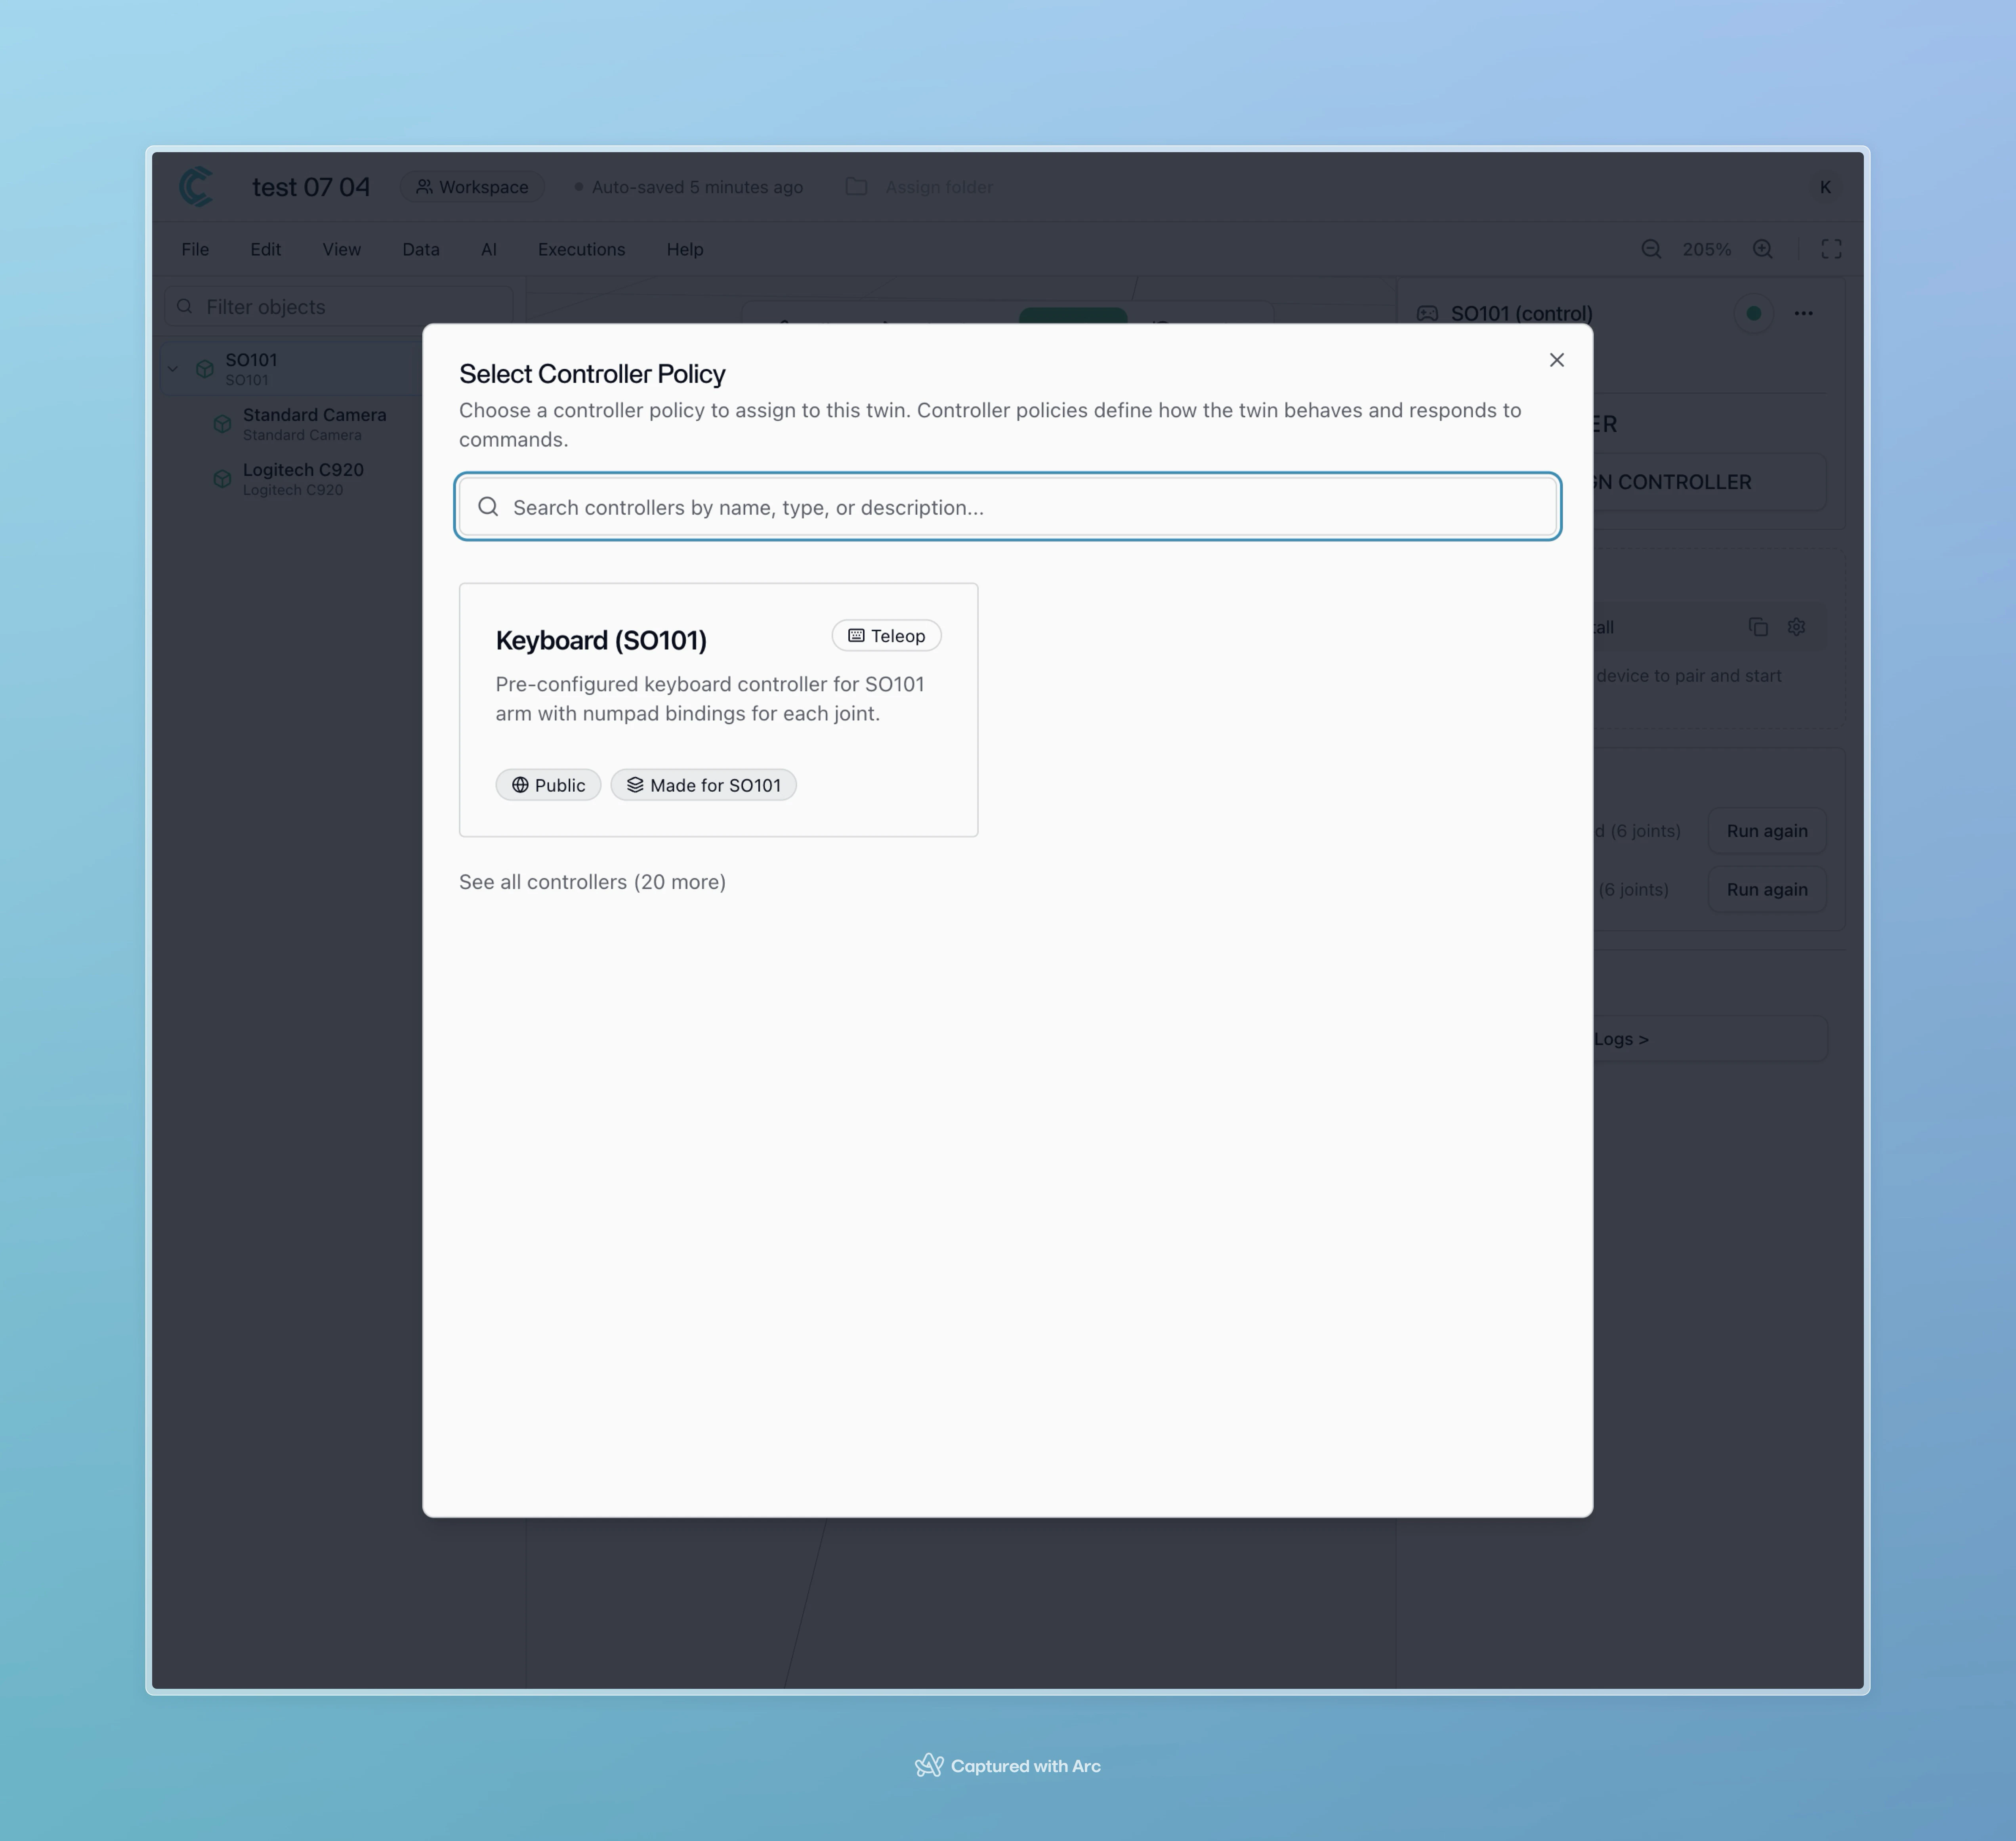
Assign the trained policy as a controller. Cyberwave decides whether the model runs on the edge device next to the arm or in a cloud node; your code doesn’t change.
Safety, simulation, and orchestration
- Human takeover anytime. When an alert fires (collision risk, drift, anomaly), swap the AI policy back to Local Teleop or Keyboard with one click; the twin keeps streaming so the handover is seamless.
- Validate in simulation first. Every environment exports to MuJoCo and a browser playground, so run the same policy against the twin before letting it touch hardware. See Simulation.
- Compose multi-step tasks. Wire perception, planning, and motion into repeatable sequences with Workflows (e.g.
camera frame → object detection → VLA policy → gripper primitive), and fall back to Python whenever a step needs custom logic.
Where to go next
Manipulation Capability
The full picture of what arms can do on Cyberwave.
SO-101 Tutorial
Step-by-step for the hobbyist arm.
UR7e Tutorial
Industrial setup with ROS 2 and the MQTT bridge.